All Categories
How to build a PC for work purposes #3
So, following #2, the plan is to get a dedicated processing/editing machine and build it to the right spec and operating system for your work.
Now comes a crucial part, one which could be a lifesaver (figuratively speaking).
This post is the genesis for these series of posts and I hope if read only one of them, then this is it.A friend of mine once said, “There are 2 types of people. People who back up and people who’ve lost everything”
How to stay safe starts with how you set up your PCA bugbear of mine is that you buy a PC/Laptop and the manufacturer has a pre-installed copy of Windows/Linux/Mac on there that uses the entire disk.
Good right?
Wrong. It’s a bad way to work and I’ll give you an example of how it should be set up and why.If you go out and buy a massive harddrive (500Gb+) and install your system and off you go then you’re in for a potential fall.
If you only have 1 hard drive (as in a laptop) then you need to partition it into at least 2 sections.C drive – Operating System (OS) and program partition
D drive – Important/Work DataDepending on the OS you use determines the size of the C partition you need. For example:
Windows 2000 – 10Gb max,
XP – 20Gb max,
Vista – 40Gb max,
Windows 7 – 40Gb maxThe above will be more than enough to hold your OS and editing programs and that’s all it should have.
If you have 2 discs in your machine, then Keep the C partition the same sizes as above and use the remaining space as scratch space for programs or a temporary area for unimportant things that don’t matter if they’re lost.
Use the entire 2nd disk for your important data only.Now you have your system installed on the C drive, install all patches and updates as required and install programs so it’s ready for use.
But before you start you should use a tool to ‘snapshot’ your system. Norton have a program called Ghost which works extremely well at this and only costs approx £40. I only use the ‘recovery disk’ which provides the snapshot of the C partition and don’t bother with the rest of the Ghost application.So why do this?
Imagine you get a hard drive failure or a virus or some corruption that trashes your system.
What are you going to do?
If the system is lost or corrupt then you need to re-install the whole thing which can take a day+ depending how many applications you have and then to reset it to the way you like as well as recovering files for applications etc.
With Ghost, you can have your system back up and running within 15 minutes.The one proviso is that you do a Ghost of the C partition regularly (I do mine on the 1st of the month) and you only need keep the last 3 months available.
Now you know why it’s pointless having your system as 1 big drive as you’d end up having to ghost everything every time, not just the core of your system.The D data partition should have it’s own backup schedule which will be more frequent and should be replicated at least weekly to an external source. I replicate my data every time I add images to my library and for ‘critical’ work or finalised images I also store it externally (webspace, DVD storage etc.) to ensure recoverability.
I’ve had to do recover my system a few times and files a couple of times and this simple practise has saved me a huuuuge amounts of time and stress by just having a snapshot of the system to hand and recent copies of my important data.
Ironically I attended a workshop recently and the photographer was waxing lyrical about how film was for forever and digital images can be lost with a hard drive crash.
I didn’t interrupt him but inside all I could think was that if he had a fire in his studio then he’d lose all his transparencies forever.
Now you’re armed with the information above, your know that your system is much more safe and your critical files are recoverable.
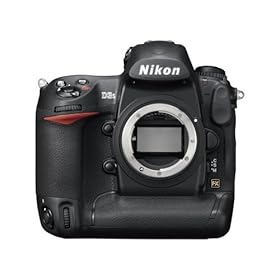
With film there’s only 1 transparency, but digital can easily be replicated (thankfully) and this should be part of our workflow.Nikon D3S – Hands on Review
I’ve been reading some great reviews about the new Nikon D3S released October 2009 and I’m in the market for a new camera, so I went to my local Jessops have a looksee.
The last camera I had a look at was Nikon’s 25mp D3X which I was unimpressed with due to the amount of noise in the resulting files. No-one mentioned that when the D3X was reviewed (unless I was testing a ‘Friday’ Camera(?)), so I approached the D3S with some trepidation.
I performed the test in exactly the same why as I did with the D3X and the D700. I set up the D3S to the same settings I have on my D700 although I may have left the D3S in matrix metering rather than center weighted (it was capturing images about 2/3 stop brighter than my D700).
Both camera set to RAW (is there any other format?) and lossless compression. I tested the cameras using my 14-24 @ 14mm ,24-70mm @ 24mm and 70-200mm @ 70mm
The main reason behind this was to see how the camera handled potential vignetting at each lens’ widest focal range.
I set the camera to aperture priority @ f/4 and ran them through the ISO range from Lo1 (ISO100) to HI3 (102,400)I ran off the initial shots with the D700 then switched to the D3S
My first impression when I put it to my eye was how quiet it was. I’m used to the loud clatter of the D700/D3 shutter, but this was much more muted – similar to sound of the Canon 5dMkII.
1st image off so I checked the back of the camera to make sure I was exposing correctly and the second thing struck me …. 100% viewfinderBefore I got the D700 I convinced myself that 95% was ok and I just have to compensate to frame accordingly. But it’s been the one thing that’s driven me semi-nuts about the D700 . Lovely camera and a real performer, but every shot needs to be re-adjusted. Becomes a nagging thorn over time.
But now with the D3S we get Dust removal, 35mm sensor and 100% viewfinder coverage – Glorious
So I carried on with the test and left the shop with a wave and the shop’s number in my pocket. Back home to load up the files and after a quick upgrade to Lightroom 2.6, in they come.
The results are …… astonishing.
With High ISO NR off and Long Exposure NR off, the D3S created files at ISO6400 that are equal if not slightly better than the D700 at ISO1600. I expected it to be good, but it still caught me a little by surprise.At 200%, you can see the images Have a slightly ‘botox’ plasticky feel to them which doesn’t seem to hold as much contrast or sharpness as the D700, but the overall result when viewed normally is nothing short of amazing.
Below is a sample @ 200% of the D3S at ISO 6400 and the D700 @ 1600


Here are the full sized images:

Do I want one, hell yes, but at £4200 RRP for the camera it’s too steep. I shopped around and found a best price, so called the guy back in Jessops. He was unable to match the proce and so unfortunately I didn’t pick it up from them.
In fact – as much as I like it, I’m not getting one(!)The reason is simple, as with the D3, the D700 followed about 6 months later as being basically the same camera, but in a smaller body and 2/3 the price.
This is still silly expensive, but for me more than just the cost. One of the reasons I like the D700 over the D3 is because I put my grip on the D700 and I have the full size camera, but if I want to travel lighter or a bit more incognito then I remove the grip and I become just another ‘tourist’
Unofficially …. the D700S is out in March – I can wait ’till then 
Contrary to the roumour mills – it will be the same 12.1Mp sensor and 720p HD video, not 16 or 18Mp and 1080p HD video (why would anyone bother with the D3S if it was a better spec?)
So until March ……In case you want one now, here’s a link to the D3S in Amazon:
Testing new Gear – Triflector and Lastolite EZYBOX (20″)
Got a whole bunch of new grip and lighting gear over the last few days and found a bit of time to do some basic testing in between paperwork to save my sanity before I go stir crazy. Managed to entice Prabha to stand in as model for the tests with promises of tea and cake as payment (she’s easily pleased 🙂 ) Here was the setup:

My impression of the ezybox is that it’s miles better than straight flash (obviously), but I prefer the feel and softer fall-off you get with shoot-through umbrellas. Overall though I was quite pleased with the results and I’m sure I will find a use for it when I want a slightly more sculpted shadow on the subject.
1 big downside. My SB-900 doesn’t fit into the ezybox coldshoe(!), so I had to use an SB-800. This is surprising considering that ithe ezybox is a newish piece of kit and the SB-900 has been available for quite a while.
<Correction: The SB-900 does fit, I just had to fit it on the other side of the coldshoe as it’s tapered to fit different sizes>
The Triflector is basically 3 small-med sized triangular reflectors mounted on a 3 legged bracket via rubber grips that let you position them in almost any direction. This gives an interesting catchlight in the eyes and give a more complete wrap of light around the subject.
Useful if you use just one light as I did here, and a viable alternative to clamshell lighting, although with the amount of coverage it throws back in the face it slightly washes out detail. I can see it being useful for muting the features of subjects with a lot of character in their face (think Gordon Ramsay), but that could defeat the purpose.
Overall I lean towards clamshell as a soft/beauty method due to it’s increase in control as well as giving slightly more contrast in the face. I can see the triflector will work well if I’m doing something corporate, so it will definitely have a home with me
Here are a few of the samples with Prabha so you can see the catchlights/shadow detail:


How to build a PC for work purposes #2
So, as in #1, the plan is to get a dedicated processing/editing machine.
What you get it entirely up to you, what your budget and OS preference is.
If you have technical person who looks after your machine(s) then it’s worth asking them how much it costs for a home-built machine Vs a pre-built one.Any IT person worth a salt will be able to put together a high-spec machine for a lot less than a shop bought one (including labour time)
For example, my current editing machine cost me £1000 to put together.It’s based on the latest Pentium processor (i7) which has 8 virtual CPU’s. It also has 12gb super fast RAM (1866), a 1Gb ATI graphics card (single) and SATA Hard drives (faster read/write to the memory). I run Windows XP64 on it, but that’s through personal preference and because Adobe’s 64 bit version of Photoshop isn’t available for Mac‘s.
To buy a PC of the same spec would have cost me easily £2000+ (and even more for a MAC PC)
Plus, because I installed the operating system myself, I left out all the programs that are unnecessary which makes the system faster, more robust and virtually impossible to be ‘hacked’.It’s important to use a 64bit Operating System if you have more than 3Gb of memory (including graphics cards) as 32 bit operating systems can only see 3Gb of memory. It also means that applications that are 64bit ‘ready’ can access all the memory available.
For example, my XP64 only takes 600Mb of the system memory, so I allow Photoshop 10Gb of the remaining memory to use as scratch space (working space for processing)
Which is plenty 🙂
With a 32 bit operating system (or program) it won’t see more than 3GbI trialled the 64 bit version of Windows 7 a few weeks ago and it was pretty quick and a huge improvement over Vista. Everything worked well including communication to my cameras (kinda important) and the connection to my Epson 9880. My performance score was 5.6 – the weakest link being my hard drive speed, so I put in an SSD (solid state disk) which brought my score up to 7.3 (7.8 being the max)
But in the end I decided to stick with XP over Windows 7 mainly because W7 requires a few more button clicks to perform regular tasks which is a step backwards in my eyes. Looks pretty and for a normal PC use it’d be fine, but for my work/editing machine I chose efficiency and function over looks.In the end the machine has to fit your needs for the work you do. the Operating system and specification of it are normally defined by use and budget, but it’s best not to skimp as if you get a machine that saves you 30 minutes a day waiting for it to process by doing it faster, then youve saved 2-3 hours a week and what’s that worth?
