General News
General News Posts
Assignment Workshop
On Saturday I attended an assignment workshop with the London Strobist guys ‘n gals. The talk was by Tom Miles which was based on a touring roadshow lecture that he’d been giving to uni’s around the UK and sponsored by Calumet and Nikon At the end of his talk he handed out a mock assignment which we had to complete within 3 hours. This included pictures, invoice and licensing forms.
The assignment list was:
- Portrait of a business person
- A sports shoe
- Family group
- A retail park/industrial estate/shopping mall
- The Hat
Here’s my diary of events……
12:05 – Assignments in hand, I decide to do "A Sports Shoe"
12:10 – Speak to a couple of guys and we decide to team up. Rams wants to do the Sport shoe too and Rich is not yet decided.
12:15 – We go looking for a nearby sports shop andRich decides to go on his own to get the business person shot. I’m secrety relieved as 2 subjects would be too much in a short time, so it’s just Rams and me… we head off looking for a sports shop.
12:25 – I formulate my shot in my head, 1st shot will be a product shot then the second one an action shot. We’re walking past a lot of furniture shops with dining tables etc in the window displays and I look in with envy as I’ll need a clean surface to shoot the product images.
I have a brainwave and decide to use my (black) car roof as the ‘reflective table’. My lights and grip gear are in the boot, I know I’ll get a more interesting background in the and we’ll be close to Calumet which eliminates any remaining travel time/stress getting back to finish the assignment. Keep it simple 🙂
12:35 – Rams decides he wants to shoot "The Hat". We discuss ideas around the hat and what shots he can do with it.
12:45 – We end up walking 1.5 miles(!) to Oxford Street to find the nearest sports shop for some shoes and a maybe the hat. I calculate we have to be done by 14:15 to pack, edit and deliver the shots by 15:00. Fortunately I started my stopwatch when we set off so I knew how long it took to get here, but I’m still getting nervous.
12:55 – Rams decides he wants to do a more classy shot with a hat so opts not to get a cap. I’m a bit worried that he may want/need a female model if he’s wanting a more classy image and he’s still not decided on the shot.
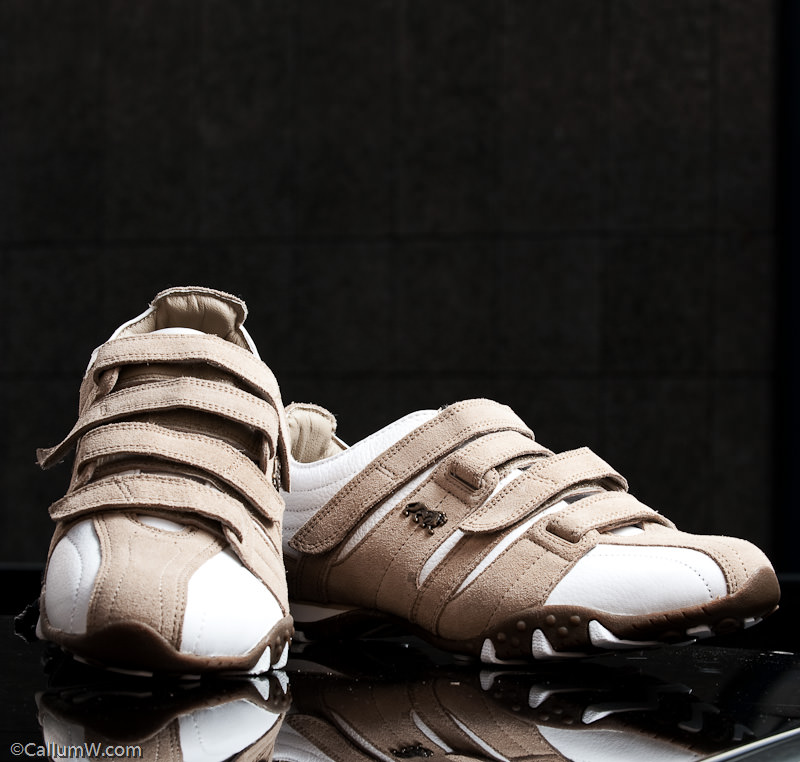
13:05 – We finally get out the shop. 1pm on a Saturday afternoon with a 50% sale and lazy staff don’t help get us out the door quickly. I chose a size 8 (Ram’s size) light tan/white shoe as this should contrast well with the black car roof. We also picked up a t-shirt and a football to use as props.
13:10 – We dip into a Boots on the way back. I know I’m using the car, so I grab a couple of bottles of water and tissues so I can clean the filth off and we grab a couple of sandwiches to munch after the assignment (and on a separate receipt as they weren’t expensed 😉 )
13:25 – Off the main street and no more shops, so I don’t think Rams will get his assignment. I convince him to enter the shoe image together.
13:35 – 1 wrong turn, but we finally get back to the (thankyou mobile GoogleMaps) and dump the bags in the car. I eye the roof and quickly pick 2 decent background shots. Rams has his sandwich to keep his sugar levels up (don’t think he’s used to walking 3 miles 😉 ) meanwhile I water and clean the roof in the area we’ll use and throw up 2 light stands. I attach an SB900 and shoot-thru umbrella on swivvel adapters to each stand and hook a PocketWizard on each.
13:45 – Getting nervous as it’s taken 90minutes just to get to the point where we can start taking shots. In the real world we would have been given the shoes and then have 2-3 hours to make the shots, but not today I want to be done by 14:15, so that’s only 30 minutes to make something…. I’m watching the clock
13:48 – First shot taken using the 70-200 (@102mm). Ambient is showing 1/80, f/11 @ISO400. Tom’s walking back from lunch and calls over that we haven’t gone very far (if only he knew…)
13:50 – Adjusted the ambient down 2 stops (1/160s @ f/16) then switched on the PocketWizards. Set the closest, almost overhead, SB900 to 1/4 and the far away rimlight SB900 to 1/1. The 70-200is struggling to focus at such a short range, so I have to manually pull focus with the DOF preview to ensure the front of the shoe is sharp and hope f/16 will be carry it all the way back. Re-composeto 80mm to make sure. Shoot, chimp, gravy 🙂
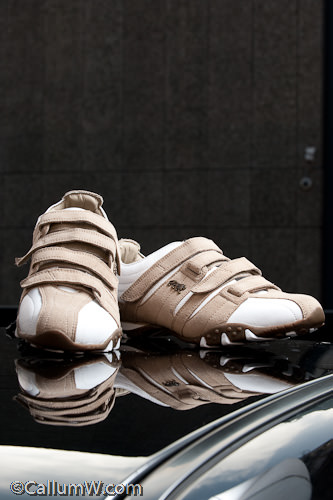
I know I’ll be cropping the frame so I’m not worried about the roof gutter being in the shot
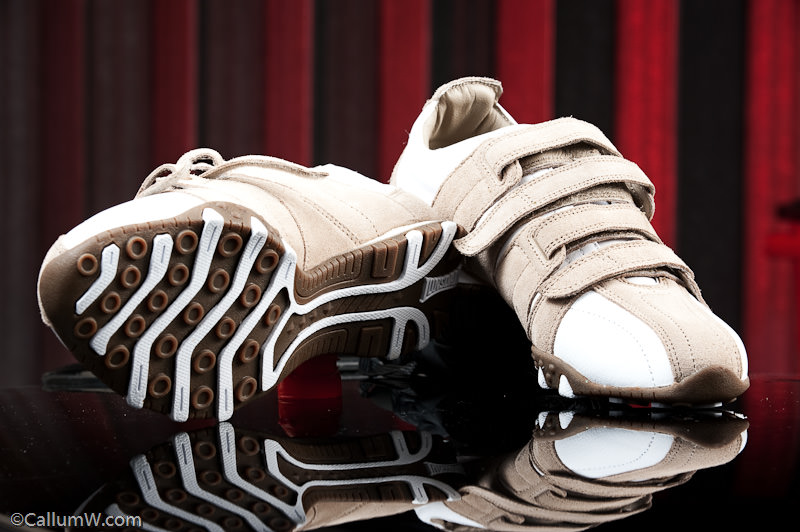
13:56 – I swing 180deg so I now have the Calumet Loading doors behind the shoes. I recompose them using the water bottle cap and my umbrella to prop them up. I show the sole of one shoe as it may be their USP. I would normally be told by the disigner or AD in a pre-meeting, but as they’re fictional I have to cover the bases.
The loading doors are angular, so I dig out my SB800 and gaffer on a red gel and PocketWizard and ask Rams (whoes now digesting 🙂 ) to be a VAL and aim the flash sideways and pointing 30deg towards the far end of the doors to feather the light. I initially set this at 1/4 @ 105mm to try and keep a deep red. 1st test shot:
Shoes need a wee bit of a tweak and the red isn’t strong enough for my liking. The ambient is wiping it out so I ramp it up to full power. Bingo 🙂
I also shoot it portrait so theoretical copy/text could be used above them (to give the fictional Art Director some options):

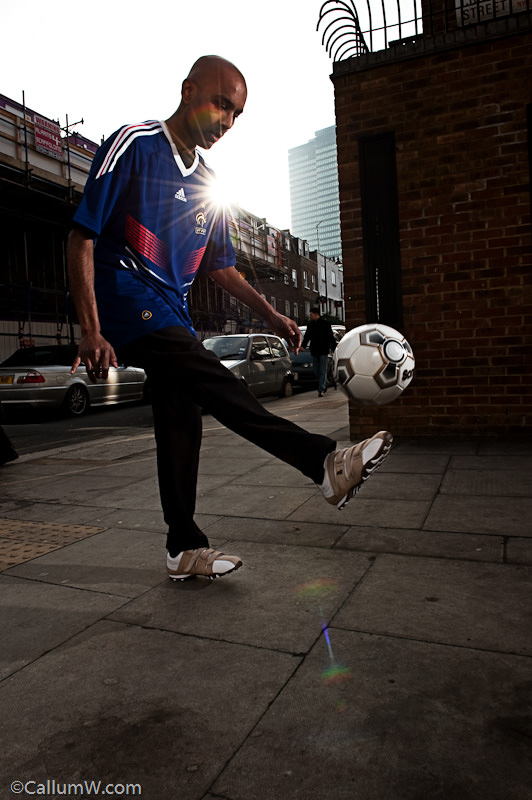
The ‘product’ type shots are ok, but we need to crack on so I get Rams to slip on the shoes and football t-shirt. Meanwhile I quicky scout over the road to a couple of areas that may have potential. I see the sun poking out over a rooftop and decide to shoot against it.
14:05 – Swap to my 24-70, put the camera in active focus mode and remove one of the SB900 umbrellas as I know I’ll need a hard light to combat the sun. We cart the lights and football over to the second ‘location’. I put the, still red gelled, SB800 on the floor by the brick wall and aim it up at about 1/2 power and 75mm zoom. The bare SB900 is set to 200mm and 1/4 power.
I move it slightly behind Rams to act as the rim light against the sun. I’m kicking myself that I didn’t bring a Justin Clamp to mount the flash sideways, but we don’t have time to run back and get it – got to keep moving. The SB900 with the umbrella is set to 1/1 and is slightly to my right – 180deg from the sun and acting as a softer fill light.
14:08 – First test shot. Need to try and pull the Aperture down to give the flashes a chance against the sun, but the PocketWizards are acting up(?). Test triggering is ok, but Camera triggering isn’t working. Very odd – never had a problem with them before. Switch it round with the one on the nearest SB900 and we’re back in action.
14:11– Tweak settings and get a solid 1/250s @f/16 @ISO400 (ouch)
I move Rams and the lights 5ft left to use the sun as a left rim and to get some more environment. Also change settings to 1/250 @ f/11 @ISO200
14:12 – Test shot …. looks alright. Sun is slightly dipped behind the building, but is filling Ram’s left side now and creating a clean rim light on his head.
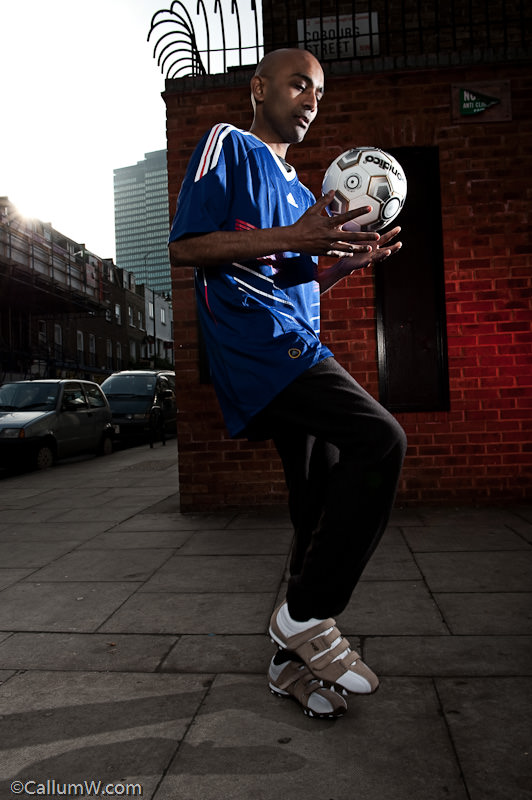
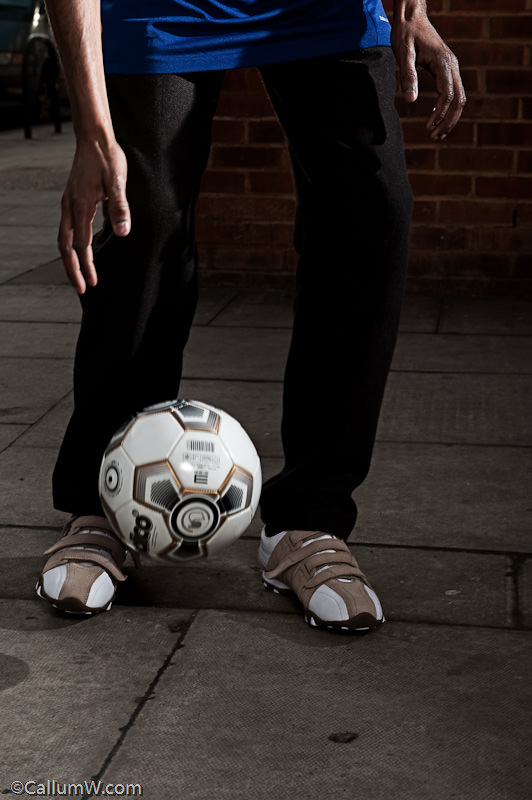
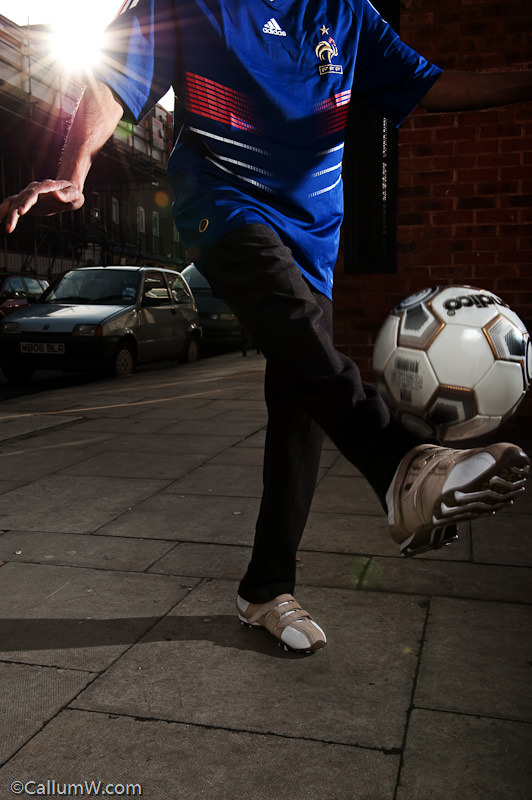
14:13 – I tweak the bare SB900 to 1/2 power as I want that rim light stronger and to give him more room to move about. Start shooting him doing keepy-up and trying to avoid pedestians in the shots. I also have to make a mad dash to save my Umbrella SB900 from tipping in the breeze and catch it (just) I reel off full length and cropped. I also get him to face me and lift his feet up to show me the sole a bit more in case it’s the fictional USP.
I can hear the SB900 and SB800 dumping. I’m trying to rush, but have to consciously wait 4s between shots. The SB800 is struggling to keep up, but I actually prefer it with the red more as an accent to the brick. No time to change it to to 1/4 power…. just shoot quicker so it doesn’t re-charge enough for a full power flash. SB900s are performing amazingly
14:18 – 5 minutes later and it’s a wrap. We have to pack up, like, NOW, so we peg it back to the car and strip the stands and put everything back where it belongs. Annoyingly I manage to break one of the PocketWizards, but I fixed it later that night with some glue.
14:30 – We head back into the room and I fire up my old Acer Laptop. Meanwhile I grab my card reader out and pack the camera in it’s bag. Some others are editing too and Rams goes to chat.
14:35 – Laptop boots up and I download the card to Lightroom. Only 64 images including set-up tests. No big surprise as I tend not to waste card space
14:40 – I make my initial selection of about 15 and then switch to full screen to preview them with and then whittle out the ones I’m less keen on.
14:42 – Running out of time, so cull a couple extra and have 7 images left to edit.
14:44 – Disaster. The laptop hangs when trying to export the Raw to Photoshop. Too much data for my old laptop to cope with (my editing desktop does it in seconds 🙁 )
14:46 – Manage to kill the hanging apps and do a manual .Tiff export. Needs to be 8bit for speed and because they’re to be delivered as .jpg.
14:47 – Slow to export, but I finally get the first image to start editing. I use one of my quick-edit Photoshop Actions which uses blending layer modes to selectivly boost contrast and also apply a selective tonemap. Resize and save as jpg. 6 more to go, meanwhile I’m trying to tell Rams what expenses, use and licensing to write on the invoice.
14:58 – Last image complete. USB keyring in (no time to burn to CD)
14:59 – Deliver edited and original images + invoice with receipts to Tom. We then got kicked out while they review the assignment shots from everyone. I meandered outside with my sandwich and reflected on the last few hours and weighed up how we coped with a short shooting schedule.
The only thing I could compare it to is shooting a wedding where there’s constant deadlines through the day, but somehow this seemed more intense as we really only had 30 minutes to shoot in what should have been 2+ hours. I wasn’t extatic about the images as they would have been far more polished (esp the product shots) with more time, but in retrospect I knew I did the best I could in the 30 mins we had so I was content enough.
Here’s the final selection with the quick edit we delivered.
Tom reviewed our shots and gave us very positive feedback which was a relief and good to hear.
Interestingly he mentioned that the cropped shots were better as you detract from the product when you see the person’s face.Afterwords Tom looked at my portfolio, really like it and gave me a couple of tips which were the icing on the cake for the day.
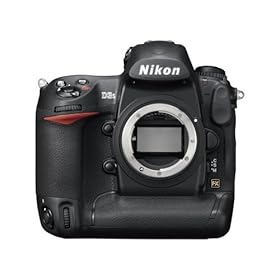
Nikon D3S – Hands on Review
I’ve been reading some great reviews about the new Nikon D3S released October 2009 and I’m in the market for a new camera, so I went to my local Jessops have a looksee.
The last camera I had a look at was Nikon’s 25mp D3X which I was unimpressed with due to the amount of noise in the resulting files. No-one mentioned that when the D3X was reviewed (unless I was testing a ‘Friday’ Camera(?)), so I approached the D3S with some trepidation.
I performed the test in exactly the same why as I did with the D3X and the D700. I set up the D3S to the same settings I have on my D700 although I may have left the D3S in matrix metering rather than center weighted (it was capturing images about 2/3 stop brighter than my D700).
Both camera set to RAW (is there any other format?) and lossless compression. I tested the cameras using my 14-24 @ 14mm ,24-70mm @ 24mm and 70-200mm @ 70mm
The main reason behind this was to see how the camera handled potential vignetting at each lens’ widest focal range.
I set the camera to aperture priority @ f/4 and ran them through the ISO range from Lo1 (ISO100) to HI3 (102,400)I ran off the initial shots with the D700 then switched to the D3S
My first impression when I put it to my eye was how quiet it was. I’m used to the loud clatter of the D700/D3 shutter, but this was much more muted – similar to sound of the Canon 5dMkII.
1st image off so I checked the back of the camera to make sure I was exposing correctly and the second thing struck me …. 100% viewfinderBefore I got the D700 I convinced myself that 95% was ok and I just have to compensate to frame accordingly. But it’s been the one thing that’s driven me semi-nuts about the D700 . Lovely camera and a real performer, but every shot needs to be re-adjusted. Becomes a nagging thorn over time.
But now with the D3S we get Dust removal, 35mm sensor and 100% viewfinder coverage – Glorious
So I carried on with the test and left the shop with a wave and the shop’s number in my pocket. Back home to load up the files and after a quick upgrade to Lightroom 2.6, in they come.
The results are …… astonishing.
With High ISO NR off and Long Exposure NR off, the D3S created files at ISO6400 that are equal if not slightly better than the D700 at ISO1600. I expected it to be good, but it still caught me a little by surprise.At 200%, you can see the images Have a slightly ‘botox’ plasticky feel to them which doesn’t seem to hold as much contrast or sharpness as the D700, but the overall result when viewed normally is nothing short of amazing.
Below is a sample @ 200% of the D3S at ISO 6400 and the D700 @ 1600


Here are the full sized images:

Do I want one, hell yes, but at £4200 RRP for the camera it’s too steep. I shopped around and found a best price, so called the guy back in Jessops. He was unable to match the proce and so unfortunately I didn’t pick it up from them.
In fact – as much as I like it, I’m not getting one(!)The reason is simple, as with the D3, the D700 followed about 6 months later as being basically the same camera, but in a smaller body and 2/3 the price.
This is still silly expensive, but for me more than just the cost. One of the reasons I like the D700 over the D3 is because I put my grip on the D700 and I have the full size camera, but if I want to travel lighter or a bit more incognito then I remove the grip and I become just another ‘tourist’
Unofficially …. the D700S is out in March – I can wait ’till then 
Contrary to the roumour mills – it will be the same 12.1Mp sensor and 720p HD video, not 16 or 18Mp and 1080p HD video (why would anyone bother with the D3S if it was a better spec?)
So until March ……In case you want one now, here’s a link to the D3S in Amazon:
Snow more ….. The cold snap continues
It’s freeeeeezing
Especially if like me (a numptie) you go out at 1a.m. to take pictures of the snowscapes with no pedestrians or traffic.Sent the pics to the local paper and they’re going to be in this weeks print (as well as online)


Also had a play with a new Tilt/Shift lens which can make the real world look like a model village:

Free IT advise
I come from a technical IT background and so I thought that I may have something of value to share on both my current set-up and best practise methods which may be of some value to someone (anyone?
 ) out there on the interweb
Over a few blog entries I’ll hopefully share with you some IT best practises that will make your computer happy which in turn will make it perform quicker and in turn improve your workflow so you can be less interrupted through your day and log-off quicker to go do something more interesting.
This isn’t necessarily just photographers – this covers anyone that uses a PC/MAC for work purposes, but I’ll lean towards the visual industry as they have higher performance requirements than the average computer user.
More to come ….